2020年6月19日 星期五

Signal Generators

(Including AD9833, AD9834, AD9850, ADF4351)

緣由
最近在學習 SDR,會需要用到 訊號產生器,市面上有的機型 具有非常強的功能,但是通常也不便宜。在網路上找一下,發現這塊 AD9833 模組,它雖然比較偏向音頻的用途,但價錢非常便宜而且取得方便,所以就買了幾塊來試試,並且用 Python 寫了對應的 driver,可以跨平台適用在 PC (Windows / Linux,需使用 USB-SPI converter)、Raspberry Pi、ESP32 上面。
後來索性把市面上較常見的幾種 signal generator 模組 (AD9833, AD9834, AD9850, ADF4351) 的 python drivers 都寫一寫,GitHub repository 在 這裡。 

訊號產生器 的 種類與特點
我將 訊號產生器 大致區分為以下三個種類:
1. 獨立機台:
機種非常多 (例子),功能會因為應用領域而有些微不同。特色為:
優點: 
  • 可以獨立使用,不需要依賴與耗用 PC 的資源。
  • 由很多硬體元件所組成,運行效率高。
  • 功能齊全完備。
缺點:  
  • 功能雖多但還是受到限制,擴充不易 (可能需要額外的費用)。
  • 有的機型 可以需依照廠商所定的 API / protocol 來與 PC介接溝通,但仍有學習門檻。
  • 廠商所提供的 driver / API / utility 不一定能跨平台 (Windows / Linux)。
  • 無法透過 MCU (例如 ESP32、Arduino) 來操作。
  • 價位較高。
2. Signal generator in an USB dongle (例子):
優點: 
  • 體積小,便於攜帶。
  • 仍含有專用的硬體元件,維持執行效率。
  • 可由 PC 上的軟體控制,應用上較為彈性。
缺點:
  • 通常較小型,功能有限。
  • 仍需透過 PC控制,某種程度地占用 PC 的資源。
  • driver / utility 不見得能跨 OS (Windows / Linux)。
  • 無法透過 ESP32、Arduino 使用。
  • 不是非常便宜。
3. Arduino-like based signal generator (例子):
優點
  •   可以獨立使用,不需要依賴與耗用 PC 的資源。
  •   便宜。
缺點
  •   不易與 PC 介接。
  •   可以獨立使用,但較難與其他設備協同作業。
  •   功能較有限。
網路上就有很多以 Arduino / ESP32 搭配 AD9833 模組的 例子,這也是我原本所採取的模式,但是有以下的考量。

Device driver 的開發模式
就以 "使用  Arduino / ESP32 或其他控制器 搭配 AD9833 來產生各種訊號" 這個目的來說,通常可以採用以下幾種開發模式:
1. 一般的開發模式:
在 PC 上編寫/編譯程式之後上傳到控制 AD9833 的裝置 (Arduino / ESP32)上,在程式中插入一些例如 "print" 的指令將執行狀況顯示出來,以作為 tracing / debugging 的依據;修正錯誤之後 再次重複以上的步驟。 
優點: 
  • 在真實的裝置中執行,其結果絕對真實。 
缺點: 
  • 須根據要檢測的點,逐一插入相對的 "print" 指令,並且要重新編譯,費工費時。
  • 無法設定中斷點,也就無法暫停程式的執行 以檢視流程與狀態。
  • 無法動態地 修改變數值 或 改變程式流程,必須重新修改編譯才行,費工費時。
  • 每次修改之後都需要重新編譯,並重新上傳到 MCU 上面,相當耗時。  
  • 跨平台的移植性較弱,為 Arduino 開發的程式 不見得可以在 ESP32、Raspberry Pi、PC 上面執行。   
優點: 
  • 不再需要手工加入 "print" 指令。 
  • 可以設定中斷點 暫停程式的執行 以檢視流程與狀態。
  • 可以動態地 修改變數值 或 改變程式流程。 
缺點:
  • 操作與設定較複雜,學習門檻較高。
  • 不是每種 MCU 都有支援。  
  • 不是每種 語言都可搭配 in-line debugger 使用 
  • 需要 IDE 有支援。 
  • 跨平台的移植性較弱,為 Arduino 開發的程式不見得可以在 ESP32、Raspberry Pi、PC 上面執行。   
 

目標
因為我比較常用 ESP32+ (Micro)Python,這邊就沒有考慮 Arduino。
這次實作 想達到的目標如下:
  • 建構必要的軟體,可以用 ESP32 / Raspberry Pi 來控制 AD9833 模組 來產生訊號。
  • 也可以使用 PC (Windows / Linux)來做控制 AD9833,這樣就可與 PC上的資源連接,例如將 PC 上的資料透過 AD9833 產生訊號發送出去。
  • 可以控制一個或多個 AD9833 來做多種 modulation (BFSK、BPSK、QPSK、IQ、FM、PM、OOK、DTMF)。
  • 開發出來的成果,可以跨 OS (Windows / Linux) 與硬體 (PC / Raspberry Pi / ESP32) 地用來控制 AD9833。
  • 開發的過程中:
    • 不需要反反覆覆的上傳程式到 MCU 上。
    • 可以設定中斷點,也可以 監看或改變 變數的內容值,不需要使用 JTag,沒有學習門檻。

  • 使用 Python
    • Python 某種程度地將 OS 與 硬體平台 抽象化,同一套 Python 程式很可能可以在 Windows / Linux,Raspberry / ESP32上面執行,只需要經過些微修改,甚至不需要修改就可以運行。
  • 使用 Adapter 設計模式:
    • 將不同平台上驅動 bus (SPI / I2C / GPIO)的方式 包裹成 統一介面 的 adapters,同一套程式可以適用在 不同的 OS (Windows / Linux) 與硬體 (PC / Raspberry Pi / ESP32) 上,僅須依據不同的環境 選用不同的 adapter 即可,所需的調整微乎其微。
  • 將 registers 元件化:
    • 依照 AD9833 的規格書,將煩人的 register 讀寫透過元件來處理,只需要指定 欄位的名稱,不需要去計算左移、右移 的位數,例如要控制 SLEEP1 的欄位,只需:
      • def _enable_internal_clock(self, value = True):
        self.control_register.elements['SLEEP1'].value = int(not bool(value))
        self._update_control_register()
    • 可以隨時列出一個 register中 各個欄位的值,例如:
    • ad.control_register.print()
      
      << Control >>    :  ('0x2000', '0b10000000000000')
      [ D15 ]        :  0
      [ D14 ]        :  0
      [ B28 ]        :  1
      [ HLB ]        :  0
      [ FSELECT ]    :  0
      [ PSELECT ]    :  0
      [ PIN_SW ]     :  0
      [ Reset ]      :  0
      [ SLEEP1 ]     :  0
      [ SLEEP12 ]    :  0
      [ OPBITEN ]    :  0
      [ SIGN_PIB ]   :  0
      [ DIV2 ]       :  0
      [ Reserved_2 ] :  0
      [ Mode ]       :  0
      [ Reserved_0 ] :  0
    • Registers 狀態的比較:
      • 可以針對 兩組不同的 registers 設定值 做比較,並列出各個欄位的差異,這在 development 階段 debug 時候非常有用。
  • 可以直接在 PC 上直接控制 AD9833 模組
    • 使用 USB-SPI converter (例如 FT232H 或 FX2LP),讓 PC 可以直接連接  使用 SPI 介面的 AD9833。
    • 透過 Bridges package,將 PC 假扮成 ESP32 / Raspberry Pi:
      • 讓 使用 USB-SPI converter 的 PC 具有 和 ESP32 / Raspberry Pi 相同介面定義的 SPI功能,將 PC 假扮成 ESP32 / Raspberry Pi,所以開發出來的 Python 程式不需要修改,直接複製過去 就可以在 PC / ESP32 / Raspberry Pi 上使用。
      • 反過來說,網路上既有裝置的 Python driver,不論是為了 Raspberry Pi 或 ESP32 寫的,都很可能 只需經過極少的調整,甚是不需要修改,就可以在 PC 上面使用,極大化地拓展 裝置可用的資源 與 PC可使用的裝置品項。
    • 對開發上的影響:
      • 在 PC 上開發程式並直接控制 AD9833 來測試,不需要反反覆覆地上傳程式到 ESP32 上。
      • 利用 PC 上的開發環境優勢,例如先進的 IDE (如 PyCharm) 來開發程式,可以設定中斷點,隨時監看執行狀況並檢視變數值。
      • 網路上既有的 Python device driver,只需經過極少的調整,就可以在 PC 上面使用,我們可以使用 PC 上 IDE 的 debug 功能,加速我們對 device 運作原理的了解,縮短開發時程。
      • 可以透過 Jupyter Notebook 來測試與使用 AD9833,兼顧程式的發展與文件的累積。
    • 對 AD9833 使用上的影響:
      • 可以透過 PC 來使用 AD9833,與PC介接 沒問題。
      • 可以與 PC 上豐富的資源做連接,可最大化且彈性的擴充功能。 
        • 可以透過 Numpy 與各式各樣的 Python modules 來準備資料。
        • 可以直接在 PC 上透過 AD9833 做 modulation 發送資訊。
      • 控制軟體化,不需要獨立的 MCU 就可以控制 AD9833。就如 SDR 的發展,可以省下部分硬體元件的成本。
      • 除了 AD9833,也可以依照相同的模式 透過 PC 控制其他的裝置,達到協同作業的目的 (例如測試自動化)。

測試結果
Basic functional tests:
Waveform manipulation
  • Tested with this notebook:
  • Frequency sweeping:
Control AD9833 with PC + FT232H (USB-SPI converter) 
using Jupyter notebook


Control AD9833 with ESP32 
(which in turns is controlled via Jupyter + MicroPython Remote Kernel)


  • Waveform juggling:
Control AD9833 with PC + FT232H (USB-SPI converter) 
using Jupyter notebook


Control AD9833 with ESP32 
(which in turns is controlled via Jupyter + MicroPython Remote Kernel)


 Modulations 


  • IQ (using two AD9833 modules)


  • DTMF  (using two AD9833 modules):


其他模組:
  • AD9834


  • AD9850 (忘了錄影)
  • ADF4351


Dependencies:
 

2019年6月5日 星期三

Verilog Edge vs. Level, Blocking vs. non-Blocking

edge_blocking


// edge 觸發 會生成 clock 和 flip-flop
// 中間過程的 blocking 運算都循序運行並即刻得出最後的結果
// blocking 的模式表示所有的運算步驟都會在這次 clock tick 之內完成

module edge_blocking(
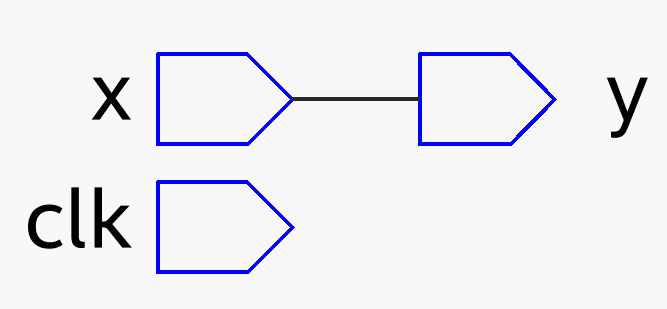
input clk, x, 
output y);
reg a, b, c, d, e;
assign y = e;
always @ (posedge clk) 
begin
a = x;
b = a;
c = b;
d = c;
e = d; 
end
endmodule


edge_non_blocking
// edge 觸發 會生成 clock 和 flip-flop
// 中間過程的 non-blocking 運算會循序串聯
// 每個 clock 的 edge 會同時對 "<=" 右邊的symbols取值,並賦予"<=" 左邊的 symbols.
// 所以 non-blocking 模式 其實是一種 parallel 模式
// 特徵是 共用一個 clock 訊號,所以一個 tick 只能作動一次

module edge_non_blocking(
input clk, x, 
output y);
reg a, b, c, d, e;
assign y = e;
always @ (posedge clk) 
begin
a <= x;
b <= a;
c <= b;
d <= c;
e <= d; 
end
endmodule


edge_blocking_non_blocking
//  中間 b = a 的 blocking 指令被當作 組合邏輯 短路跳過了
module edge_blocking_non_blocking(
input clk, x, 
output y);
reg a, b, c, d, e;
assign y = e;
always @ (posedge clk) 
begin
a <= x;
b = a;  
c <= b;
d <= c;
e <= d; 
end
endmodule


edge_blocking_non_blocking (2)
module edge_blocking_non_blocking(
input clk, x, 
output y);
reg a, b, c, d, e;
assign y = e;
always @ (posedge clk) 
begin
a <= x;
b = a + 1'b1;
c <= b;
d <= c;
e <= d; 
end
endmodule


level_non_blocking
// level 觸發 不會生成 clock 和 flip-flop
// 中間過程的 non-blocking 運算其實和 blocking 運算 並無差別 
// 等同於 對 wire 做 assign 的效果,是一種組合邏輯的方式
// level 的觸發方式之下,使用 non-blocking 和 blocking 並無差別
// non-blocking 只對於 flip-flop 這種有記憶性,有時間差的線路 才有意義
// 對於 level觸發的 組合邏輯線路,無法做到 non-blocking
// blocking vs. non-blocking 的說法是有點誤導的,應該說是 sequential vs. parallel.
// level 觸發 一律使用 sequential (blocking) 的模式
// edge 觸發 才會使用 clock 和 flip-flop,才會需要區分  sequential (blocking)  和 parallel (non-blocking) 模式。
// 

module level_non_blocking(
input clk, x, 
output y);
reg a, b, c, d, e;
assign y = e;
always @ (*) 
begin
a <= x;
b <= a;
c <= b;
d <= c;
e <= d; 
end
endmodule


level_blocking
module level_blocking(
input clk, x, 
output y);
reg a, b, c, d, e;
assign y = e;
always @ (*) 
begin
a = x;
b = a;
c = b;
d = c;
e = d; 
end
endmodule


level_mixed
// 因為只有對 clk sensitive,所以 clk 會有 latch 的作用
// clk 是 level sensitive ,所以不是使用 flip-flop 的方式製作,而是使用 latch 的模式

module level_mixed(
input Din, clk,
output s3);

reg s1, s2;

always @ (clk)
if (clk)
begin
s1 <= Din;
s2 = s1;
s3 <= s2;
end
endmodule


level_mixed - 2
// 因為只有對 clk sensitive,所以 clk 會有 latch 的作用
// clk 是 level sensitive ,所以不是使用 flip-flop 的方式製作,而是使用 latch 的模式

module level_mixed(
input Din, clk,
output s3);

reg s1, s2;

always @ (clk)
if (clk)
begin
s1 <= Din;
s2 <= s1;
s3 <= s2;
end
endmodule


2019年4月3日 星期三

Bridges - Pretend your PC a Raspberry Pi or an ESP32 to connect I2C/SPI/GPIO/UART peripherals

Grand Island bridges


Wei Lin
2019-4-2

[Usage Scenarios]

Read on if these scenarios suit you:

[Motivations]

  • Need to use some I2C/SPI/GPIO/UART interfaced device with my PC:    
    • One of my Python projects needs to use a SPI-interfaced device.     
    • However, there is no external SPI interface available on the PC, therefore comes the bus-converter.
  • Bus-Converters selection:
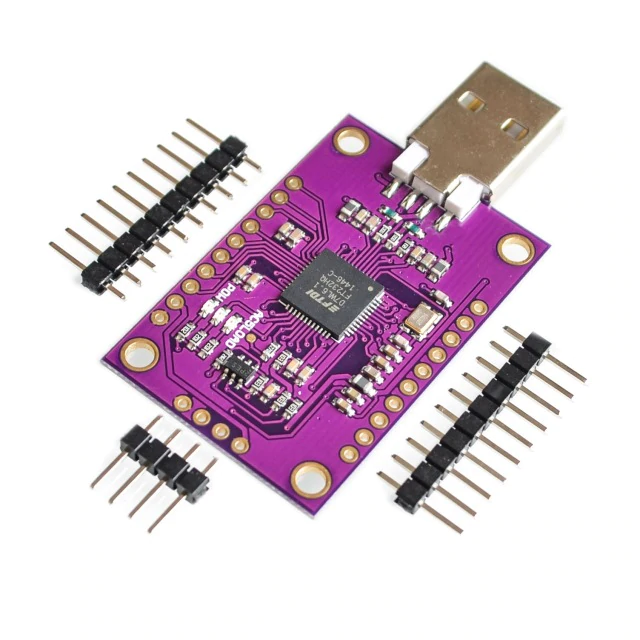
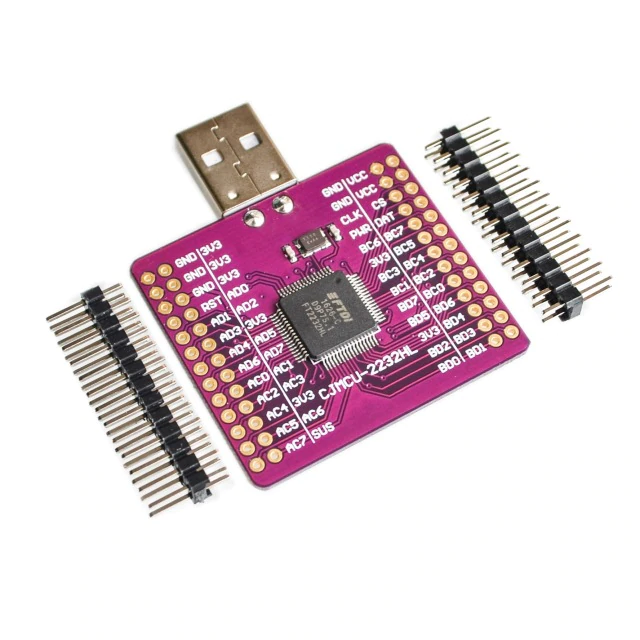
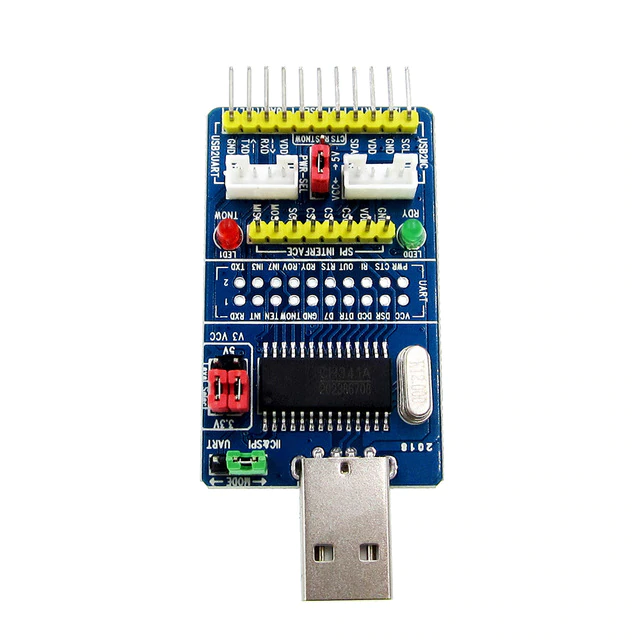
    • There are many USB to I2C/SPI/GPIO/UART converters available on the market. FT232H (1 channel) / FT2232H (2 channels) from FTDI and CH341 from WCH ... is popular. FTDI's documentation and development resources are quite complete and relatively easy to develop.     
    • PyFtdi was chosen to drive FTDI chips, it only depends on PyUSB. In addition, we nee also...
  • Drivers for the device:     
  • Requires Adapters to convert interfaces:     
  • Pretend your PC an ESP8266 / ESP32 / Raspberry Pi:     
    • As long as the device driver can run on a PC, and the SPI interface object it faces has exactly the same behavior of the SPI interface object on the ESP32, then the PC "IS" an ESP32 to the device driver. So in this cases, PC is an ESP32 simulator, at least to the device driver. So, we can...
  • Utilize powerful development resources and debugging environment from PC:    
    • For example, when developing a device driver, you can use PyCharm to set breakpoints and to inspect variables whenever needed. 
    • No more "print" to debug, no more repeatedly uploading code to the controller.
FT232HFT2232HCH341A

[Goals and Features]

  • Writing a package to simulate the I2C/SPI/GPIO/UART interface objects for MicroPython+ESP8266/ESP32 and Raspberry Pi on PC:
    • Interface objects in MicroPython + ESP8266 / ESP32 environment:
      • machine.I2C
      • machine.SPI
      • machine.Pin
      • machine.UART
    • Interface objects in the Raspberry Pi environment:
      • smbus2.SMbus
      • spidev.SpiDev
      • RPi.GPIO
      • PySerial.Serial
  • Can drive many bus-converters simultaneously:
    • Multiple bus-converters can be connected at the same time, and the number is limited only by the specification of USB and power supply capability.
  • Can function under Windows / Linux:
    • No modification is required.
  • Can be used on PC / Raspberry Pi or any machines that can run PyFtdi package:
    • No modification is required.

[How to use]

Simulating for MicroPython + ESP8266 / ESP32

# On ESP32 with MicroPython
from machine import I2C

i2c = I2C(freq = 400000)

# On PC
from bridges.ftdi.controllers.i2c import I2cController
I2C = I2cController().I2C

i2c = I2C(freq = 400000)

    
# On ESP32 with MicroPython
from machine import SPI

spi = SPI(id, baudrate = 10000000, polarity = 0, phase = 0)
spi.init()

# On PC
from bridges.ftdi.controllers.spi import SpiController
SPI = SpiController().SPI

spi = SPI(id, baudrate = 10000000, polarity = 0, phase = 0)
spi.init()
     
# On ESP32 with MicroPython
from machine import Pin

p0 = Pin(0, Pin.OUT)
p0.value(0)
p0.value(1)

p2 = Pin(2, Pin.IN, Pin.PULL_UP)
Print(p2.value())

# On PC
from bridges.interfaces.micropython.machine import Pin
from bridges.ftdi.controllers.gpio import GpioController
machine = GpioController()

p0 = machine.Pin(0, mode = Pin.OUT) 
p0.value(0)
p0.value(1)

p2 = Pin(2, Pin.IN, Pin.PULL_UP)
Print(p2.value())
  
# On ESP32 with MicroPython
from machine import UART

uart = UART(1, 9600)
uart.init(9600, bits=8, parity=None, stop=1)

# On PC
from bridges.ftdi.controllers.uart import UartController
UART = UartController().UART

uart = UART(1, 9600)
uart.init(9600, bits=8, parity=None, stop=1)

Simulating for Raspberry Pi

# On Raspberry
from smbus2 import SMBus 

bus = SMBus(1)
b = bus.read_byte_data(80, 0)
print(b) 

# On PC
from bridges.ftdi.controllers.i2c import I2cController
SMBus = I2cController().SMBus

bus = SMBus(1)  # the bus number actually doesn't matter.
b = bus.read_byte_data(80, 0)
print(b) 
# On Raspberry
import spidev

spi = spidev.SpiDev()
spi.open(bus, device)
to_send = [0x01, 0x02, 0x03]
spi.xfer(to_send)

# On PC 
from bridges.ftdi.controllers.spi import SpiController
spidev = SpiController() 

spi = spidev.SpiDev()
spi.open(bus, device)
to_send = [0x01, 0x02, 0x03]
spi.xfer(to_send)

# On Raspberry
import RPi.GPIO as GPIO

GPIO.setmode(GPIO.BOARD) 
GPIO.setup(6, GPIO.OUT)

# On PC
from bridges.ftdi.adapters.rpi.RPi import GPIO 

GPIO.setmode(GPIO.BOARD)  # mode actuall doesn't matter.
GPIO.setup(6, GPIO.OUT)

# On Raspberry
import serial
ser = serial.Serial('/dev/ttyUSB0') 

print(ser.name)        
ser.write(b'hello')     
ser.close()            

# On PC
from bridges.ftdi.controllers.uart import UartController
ser = UartController().Serial() 

print(ser.name)        
ser.write(b'hello')     
ser.close()      

[Test results]

  • Breakpoints and variables inspection 


  • Transceive LoRa packages directly from your laptop 


Notes

  • Mainly supports FTDI chips for now.
    • For CH341A:
      • Only I2C and GPIO functions are implemented, no SPI.
      • UART can be driven directly with the driver from WCH.
  • FTDI chip limitations
    • No IRQ.
      • The FT232H/FT2232H does not have endpoint of "interrupt input" type, IRQ functionality can only achieved with polling, which is too CPU intensive.
    • No PWM. PyFtdi, FT232H/FT2232H doesn't support.
    • In the same channel, the functionality of GPIO can coexist with SPI, but not with I2C/UART.
    • GPIO has no pull-up / pull-down functions.

References